Written by: Doug Camplejohn, CEO & Co-Founder, Coffee
Key Takeaways for CRM Tracking Scripts
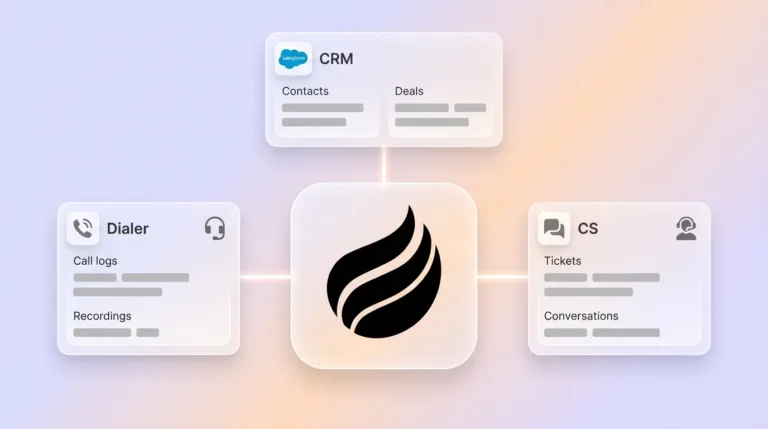
- CRM tracking scripts capture visitor data like name, title, company, and behavior so you can identify high-intent visitors before they leave your site.
- Install scripts in the <head> section of every page using a simple 7-step process that includes generating, copying, pasting, and verifying your code.
- Coffee, HubSpot, and Salesforce offer compatible pixels, with Coffee providing AI-based individual identification and real-time Slack alerts.
- WordPress and Shopify users can add scripts manually via functions.php or theme.liquid for cleaner setups and better performance.
- Start with Coffee’s tracking pixel to get real-time visitor alerts and persona-matched leads that improve pipeline efficiency.
Access, Credentials, and Timing Before You Install
Confirm you have administrative access to your website’s HTML or content management system before you install any CRM tracking script. You need either direct access to edit theme files or permissions to add custom code through your CMS dashboard. For Google Tag Manager implementations, verify you have container editing rights so you can publish new tags.
The installation process usually finishes quickly and often does not require a developer. Collect your CRM account credentials, then locate your tracking script or pixel code in your platform’s settings so you can copy it in one step. Coffee users generate their visitor identification pixel from account settings, which keeps the setup process straightforward.
When you are ready to install Coffee’s pixel for instant visitor alerts, generate your tracking code in minutes from the pricing and setup page.
Quick 7-Step Install for Any CRM Tracking Script
Use this universal 7-step process for installing almost any CRM tracking script on your site.
Step 1: Generate Your Tracking Script
Log into your CRM dashboard and open the tracking or analytics section. In Coffee, go to Settings > Visitor ID to generate your pixel. For HubSpot, find the tracking code in Settings > Tracking & Analytics > Tracking Code (or Tracking Code for Marketing Starter or free tools accounts). Salesforce users should open Setup and navigate to Custom Code.
Step 2: Copy the Script Code
Copy the full JavaScript snippet that your CRM provides without editing it. Coffee’s pixel script includes visitor identification and Slack integration in the same snippet, so you only need to paste it once.
Step 3: Access Your Website’s Head Section
Open your website’s HTML editor or CMS admin panel and locate the theme editor or custom code area. Navigate to the section that controls the <head> tag so you can add the script globally.
Step 4: Paste Before the Closing Head Tag
Insert the tracking script immediately before the </head> tag on every page template. This placement loads the script early and supports consistent data capture across your entire site.
Step 5: Implement with Google Tag Manager (Optional)
For more advanced setups, GTM best practices recommend server-side tagging to improve performance and privacy controls. Create a custom HTML tag with your CRM script, then set a trigger that fires on all page views for reliable tracking.
Step 6: Use Platform-Specific Installation Methods
WordPress users can add scripts through functions.php with the wp_head hook or directly in header.php. Manual WordPress installation avoids plugin dependencies and often improves site speed. Shopify users should edit the theme.liquid file and place the script in the <head> section.
Step 7: Save and Verify Installation
Publish your changes, then test the installation using browser developer tools or your CRM’s verification system. Coffee provides real-time installation confirmation in its dashboard and sends immediate visitor alerts once the pixel fires correctly.
The table below compares key features across three major CRM tracking platforms so you can see how each option supports visitor identification and alerts.
| Feature | Coffee Pixel | HubSpot Tracking Code | Salesforce Pixel |
|---|---|---|---|
| Persona-Matched Leads | Yes (2–3 suggested contacts with LinkedIn) | Available with extra configuration | Available with extra configuration |
| Slack Alerts | Real-time notifications | Available through integrations | Available through integrations |
| Setup Time | Fast | Fast | Fast |
| GTM Compatible | Yes | Yes | Yes |
While this 7-step process works for most setups, each CRM platform handles tracking scripts a little differently. The next section walks through those platform-specific details so you can find the right code and features in each tool.
CRM-Specific Installs for Coffee, HubSpot, and Salesforce
Coffee Pixel Installation
Coffee uses a free pixel generator that keeps installation simple for most teams. The script identifies individual visitors with name, title, and company data, then sends persona-matched lead suggestions directly to Slack. Coffee’s pixel also works with Google Tag Manager, which helps teams align tracking with privacy and consent requirements.
Install HubSpot Tracking Code
HubSpot’s tracking code requires manual placement in your site’s <head> section. Open your HubSpot account, go to Settings > Tracking & Analytics > Tracking Code, and copy the script that appears. The HubSpot pixel supports individual visitor identification capabilities when combined with HubSpot’s contact and events features.
Salesforce Pixel Setup
Salesforce tracking uses a custom implementation that starts in the Setup menu. Generate your tracking code under Custom Code settings, then install it using the same <head> placement guidelines described earlier. Salesforce Interactions SDK focuses on website visitor profile data and interactions so you can build behavior profiles and create segmented audiences.
Google Tag Manager Implementation
Teams that manage several tracking scripts often centralize them in GTM for easier control. GTM best practices recommend scalable naming conventions and constant variables for CRM endpoints. Server-side tagging can further improve site performance and data accuracy by shifting work away from the browser.
WordPress Installation Without Plugins
WordPress users can add tracking scripts via functions.php with the wp_head hook, which prevents theme update overwrites and keeps code organized. This method works well for CRM pixels and reduces reliance on extra plugins.
Why Many Teams Start with Coffee’s Tracking Pixel
Coffee’s visitor identification pixel provides more detailed lead data than traditional CRM tracking scripts. While HubSpot captures the behavioral data mentioned earlier, Coffee goes beyond those metrics to identify individuals at visiting companies. Unlike tracking that focuses only on company-level information, Coffee’s AI matches each visitor to a specific role and LinkedIn profile.
This individual-level data powers Coffee’s AI system, which suggests a small set of likely outreach targets for each visiting company. These focused suggestions reduce manual research time and help sales teams contact the right people sooner. Coffee’s real-time Slack notifications support immediate follow-up on high-intent visitors, which often improves conversion rates compared with delayed email alerts.
The pixel connects to your existing CRM workflow and adds enriched visitor data without extra manual entry. For 2026, many teams skip manual data entry in legacy CRMs and rely on Coffee’s agent to turn anonymous visits into qualified pipeline opportunities. Start your free Coffee trial to see how quickly your website traffic can become revenue-ready leads.
Test Your CRM Tracking Script Installation
Confirm your CRM tracking script works by using Google Tag Assistant or your platform’s built-in verification tools. Coffee also shows real-time installation status in its dashboard and displays visitor identification as soon as the pixel fires correctly.
Run a live test by visiting your website from another device or an incognito browser window. A successful setup triggers visitor alerts in your CRM dashboard or Slack channel within a few minutes. Open browser developer tools to verify that the script loads without errors and fires on each page view.
For advanced setups that use GTM’s server-side features, confirm that events reach your CRM through the server container. Watch for console errors or blocked requests that could signal ad blocker interference or misconfigured tags.
FAQ
Which page should I install the CRM tracking code on?
Install your CRM tracking script in the <head> section of every page on your website. A site-wide script captures complete visitor journeys and supports accurate lead attribution. Partial installation on only a few pages creates gaps in visitor data and causes missed lead opportunities.
How does Coffee’s pixel compare to HubSpot’s tracking code?
Coffee’s pixel focuses on individual visitor identification with names, titles, and LinkedIn profiles that sales teams can act on quickly. HubSpot’s tracking code collects behavioral and technical data for self-identified visitors, including activity, page paths, and visitor IDs. Coffee adds AI-based lead suggestions and real-time Slack alerts on top of this style of tracking, and the installation process remains fast for most sites.
Can I add tracking code to WordPress without plugins?
Yes, you can manually add CRM tracking scripts to WordPress by editing your theme’s functions.php file and using the wp_head hook. You can also place the code directly into header.php before the closing </head> tag if you prefer template edits. The functions.php method is usually better because it survives theme updates when you use child themes and keeps your tracking code organized.
How do I use Google Tag Manager for multiple CRM scripts?
GTM supports multiple CRM tracking scripts by using separate custom HTML tags with unique triggers and variables. Create one tag for each CRM platform and apply consistent naming conventions such as “CRM – Coffee” or “CRM – HubSpot.” Use constant variables for tracking IDs so you can update values in one place when credentials change.
What should I do if my HubSpot pixel is not firing?
Check for ad blocker interference first, then confirm the script sits in the <head> section of your pages. Use browser developer tools to inspect console errors and verify that the script syntax matches the version from your HubSpot account. Test from several browsers and devices so you can separate local issues from site-wide configuration problems.
Conclusion: Install Your Script and Improve CRM Data
A properly installed CRM tracking script turns anonymous website traffic into qualified leads through a clear 7-step process. Generate your script, copy the code, access your site’s <head> section, paste before </head>, add GTM if needed, apply platform-specific methods for WordPress or Shopify, and verify that tracking works.
Coffee’s visitor identification pixel adds individual-level data, AI-based lead suggestions, and real-time Slack alerts that extend traditional CRM tracking. The quick installation and automatic CRM enrichment reduce manual data entry and help teams capture more pipeline from existing traffic.
Stop losing revenue to anonymous visitors and incomplete tracking. Install Coffee’s pixel to start converting traffic into qualified leads automatically. See Coffee pricing and features to choose the plan that fits your team.